


How to Adjust Colors of Existing Strokes in Procreate
Featuring techniques like Curves, Hue/Saturation/Brightness, Bloom, and layer overlays.

Hello! 👋
Hope this one will be massively helpful ☺️
We discussed embroidery brushes’ color selection in these guides:
Today, I’d like to share tips on how to adjust existing artworks created with the brushes from these collections:
Here’s a confession — I’m bad at selecting colors right off the bat. Even for my own brushes. Because no brush would make up for the lack of formal art education. I’m a system analyst, by the way (it’s a confession number two ☺️).
To deal with that, I’ve developed several neat tricks I use when things go south with my color selections.
Core Tip: Keep separate elements on separate layers. As long as your layer limit allows.
Adjustments → Hue
To say I’ve used this method hundreds of times would be an underestimation.
It does exactly what it sounds like - changes the hue of a selected layer.
To use it:
Select the layer whose color you’d like to change.
Go to the Adjustments menu (marked with a magic wand in Procreate).
Tap on Hue, Saturation, Brightness.
Play with the Hue bar until you find the color that you feel is right.

Adjustments → Curves / Saturation
I’m a big fan of working in Procreate with a dark interface, at night, with my iPad brightness set somewhat high.
So, it’s no surprise that when I look at those creations in normal daylight (or worse, against light backgrounds), colors that looked fresh and vibrant at night can appear like low-contrast mud during the day.
This is when the Curves adjustment comes in handy.
To increase brightness and improve contrast, follow these steps:
Select the layer whose color you’d like to change.
Go to the Adjustments menu (marked with a magic wand in Procreate).
Tap on Curves.
Grab the curve (the diagonal line) and drag it a bit upwards until the colors look right to you.

Then, if you'd like to desaturate the result a bit for whatever reason, you could:
Select the layer whose color you’d like to change.
Go to the Adjustments menu.
Tap on Hue, Saturation, Brightness.
Play with the Saturation slider until the result satisfies you.
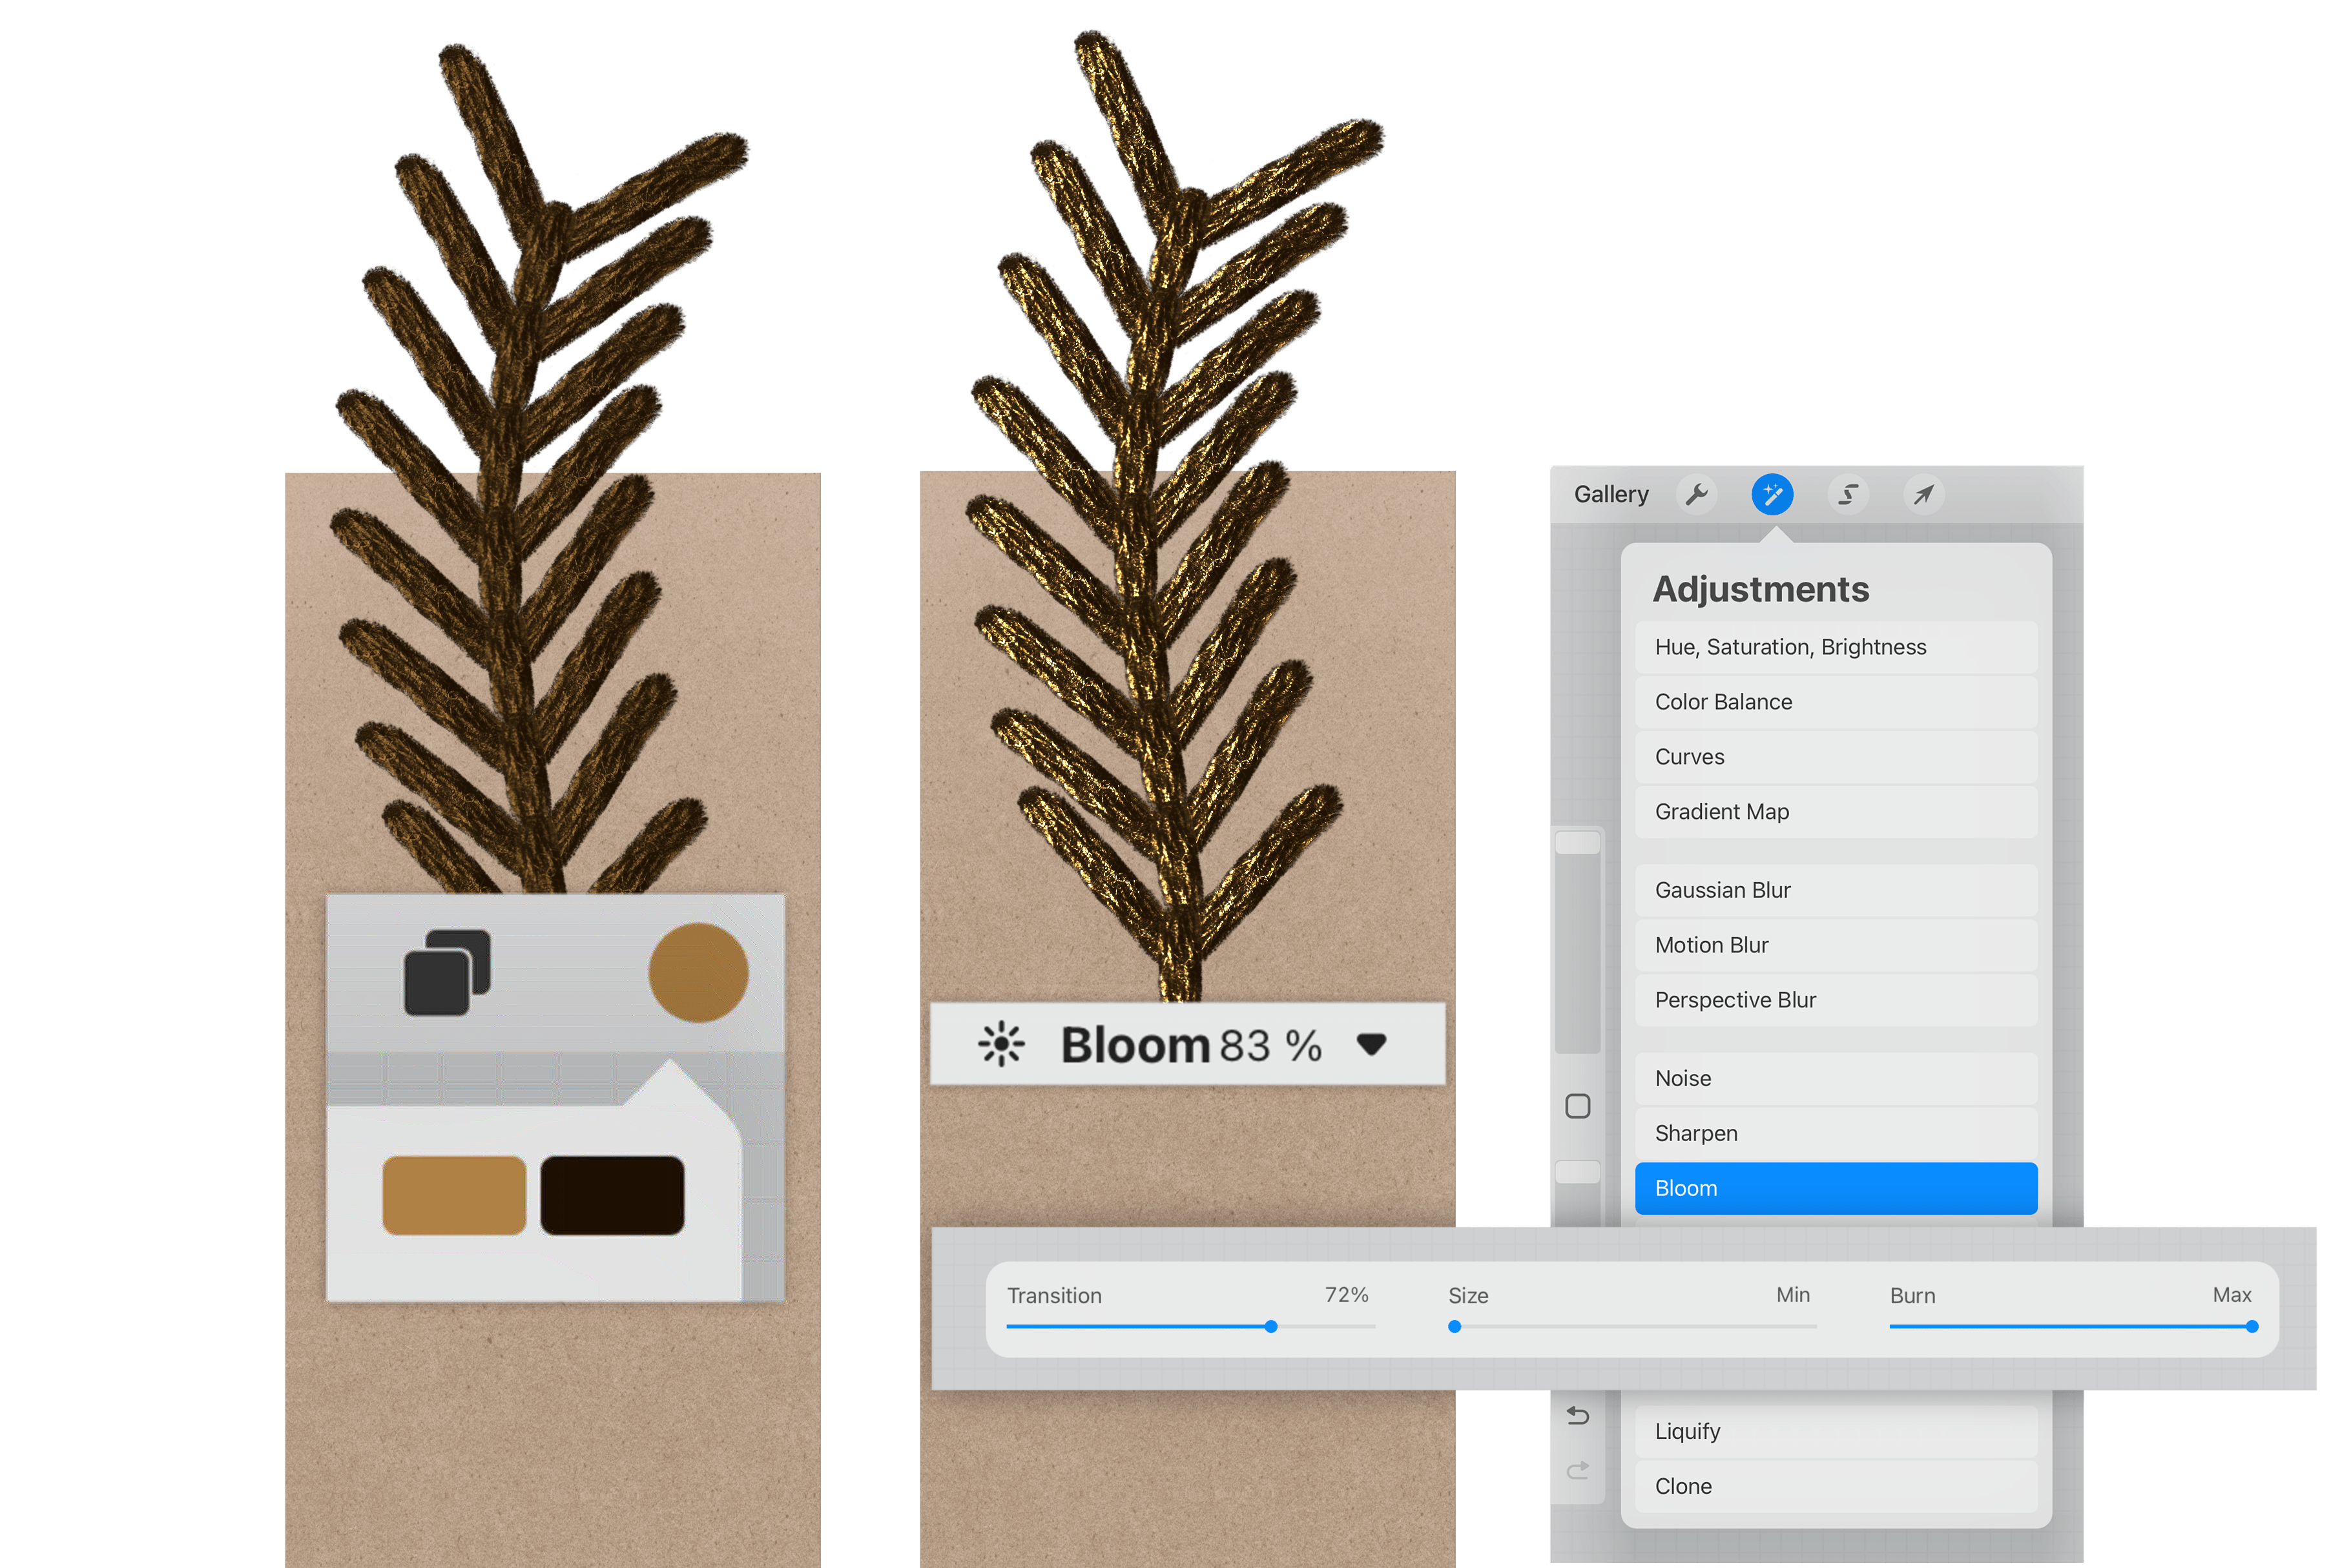
Adjustments → Bloom
This is a secret weapon for adding metallic shine to matte stitches.
So, if you ever find yourself wishing a matte element had some shine (it happens to me often!), fear not — the Bloom adjustment is perfect for creating that effect.
Below are the settings I typically play with when using Bloom.

Overlays
Another easy way to change color is by using a new layer with a specific blend mode. This method allows you to be flexible and decide precisely which areas you’d like to recolor.
To use this method:
Create a new layer directly above the layer you want to adjust.
Clip this new layer to your original layer (in Procreate, tap the new layer and select 'Clipping Mask').
Set the blending mode of the new layer to Color (You can also experiment with other modes, but 'Color' is ideal for changing hue and saturation while preserving luminosity).
Pick a soft brush (for example, the Shadow Builder brush from the Base brush sets).
Select your desired new color and simply paint over the areas you want to change on the clipped layer.

Hope this was helpful!
Until next time, please feel free to leave any questions you have in the comments below.
With 💖,
Kate from bokettori