How to Set Colors for Dual-Color Embroidery Brushes (🔲 & 🔳 Explained)
A quick guide to help you pick the right colors and avoid weird stitches.

Hello, creative souls! 🪡
If you're using my embroidery and embellishment brushes for Procreate, you've probably noticed some of them are marked with 🔲 or 🔳. These icons indicate that the brush requires two colors to work.
Such dual-color brushes can be found in:
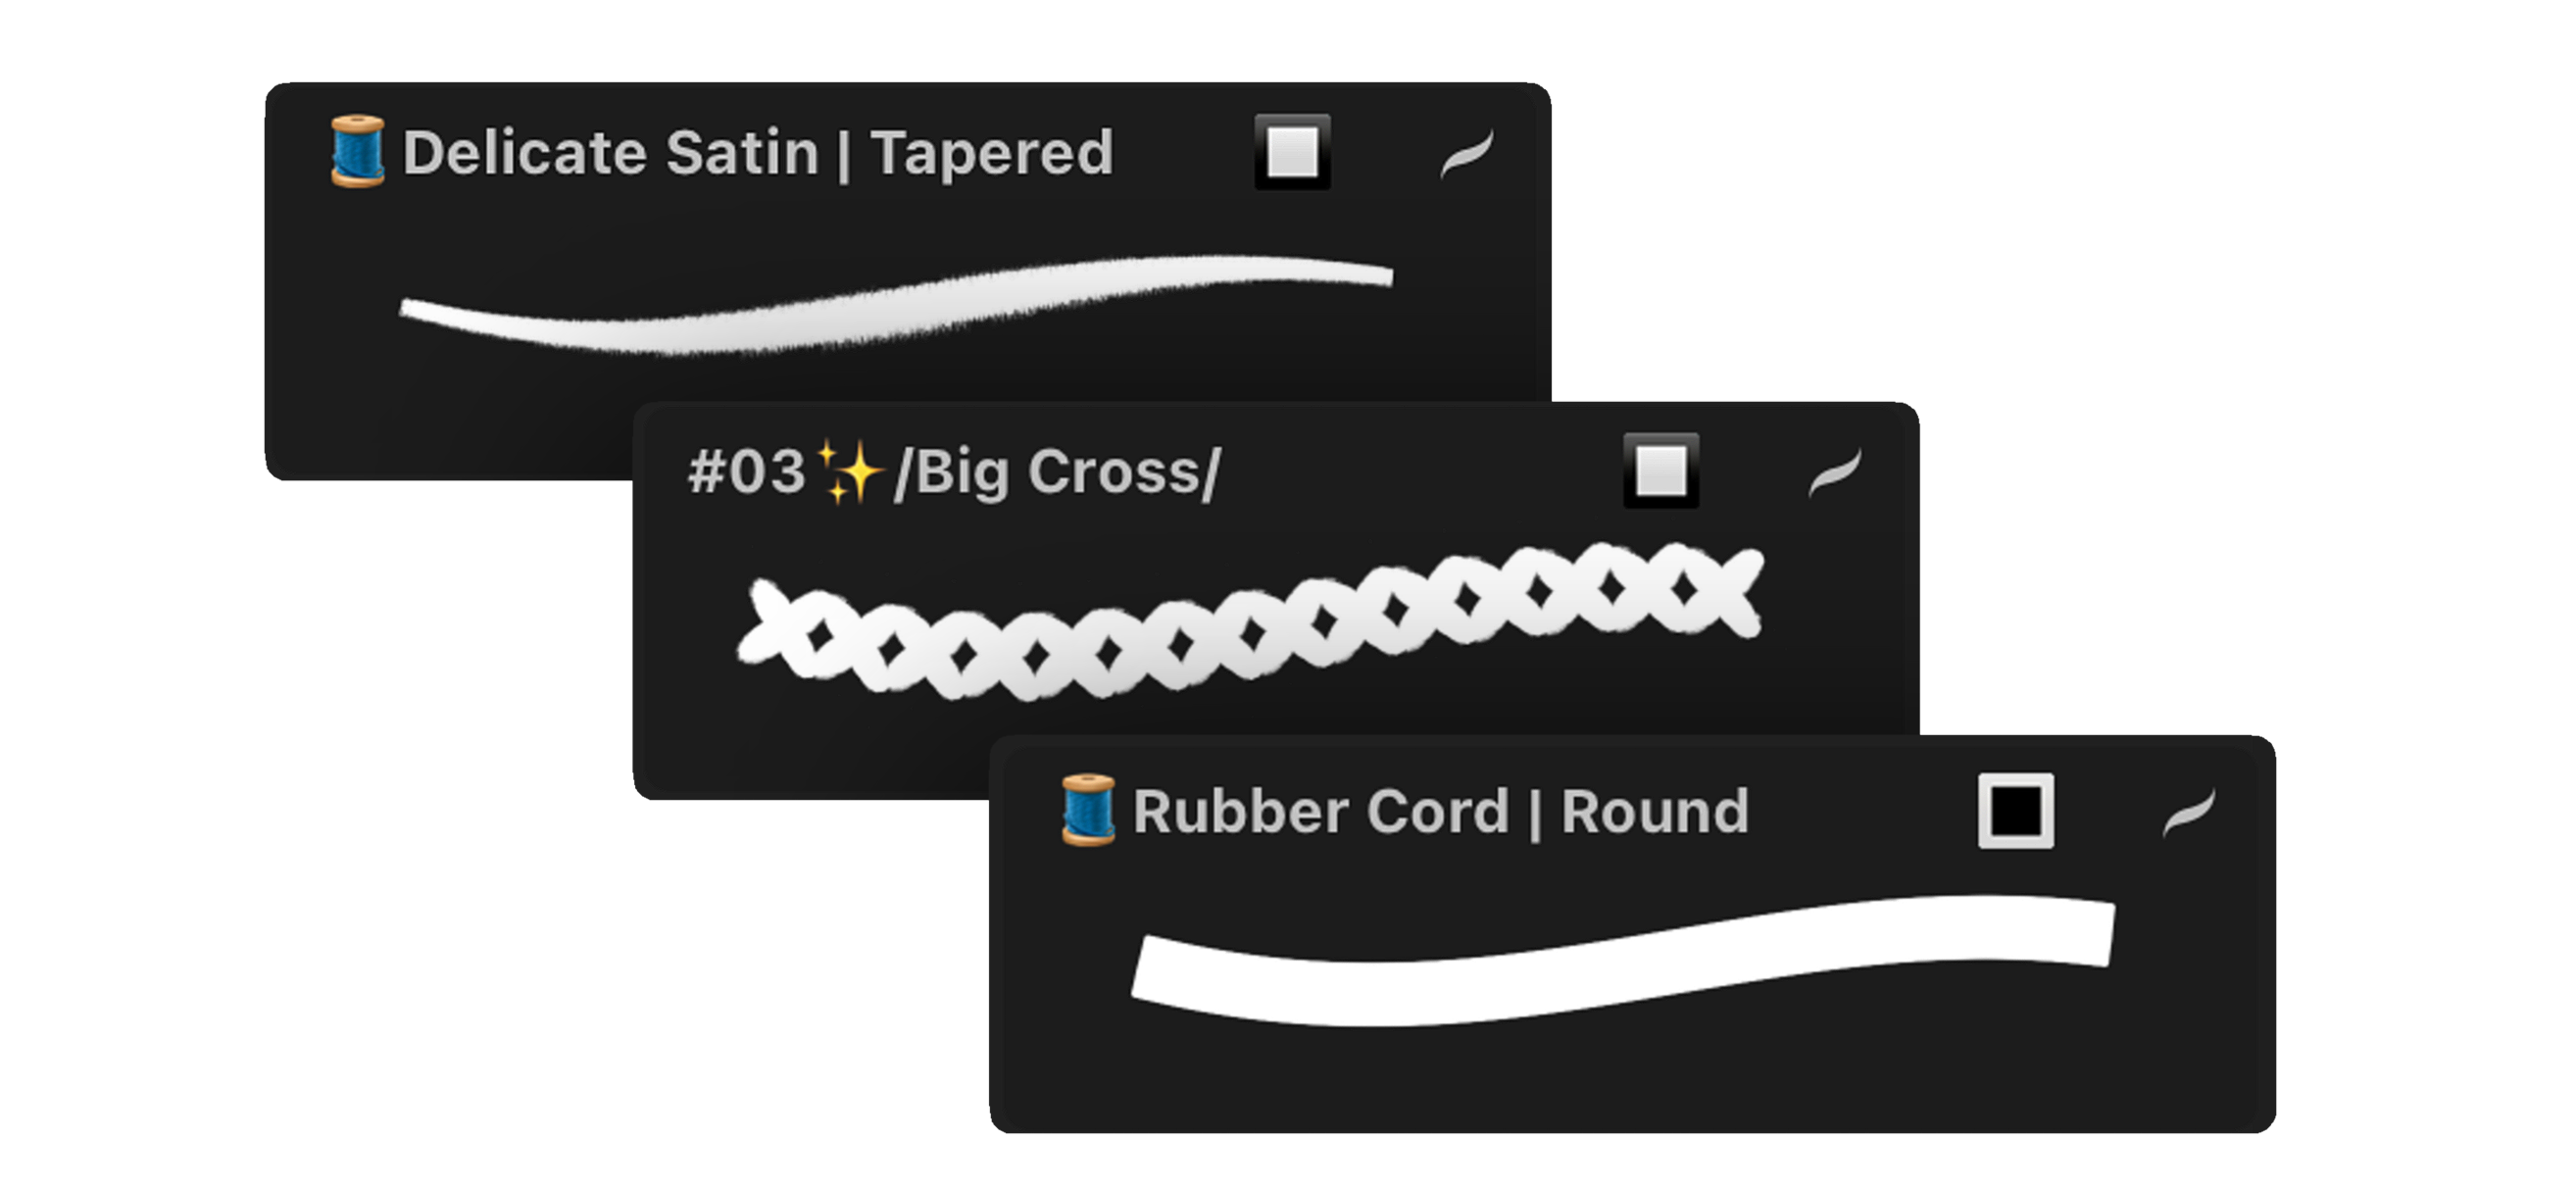
🔲 or 🔳 in a brush name means the brush is dual-color and requires a pair of colors to work.
But what color options does Procreate offer us?
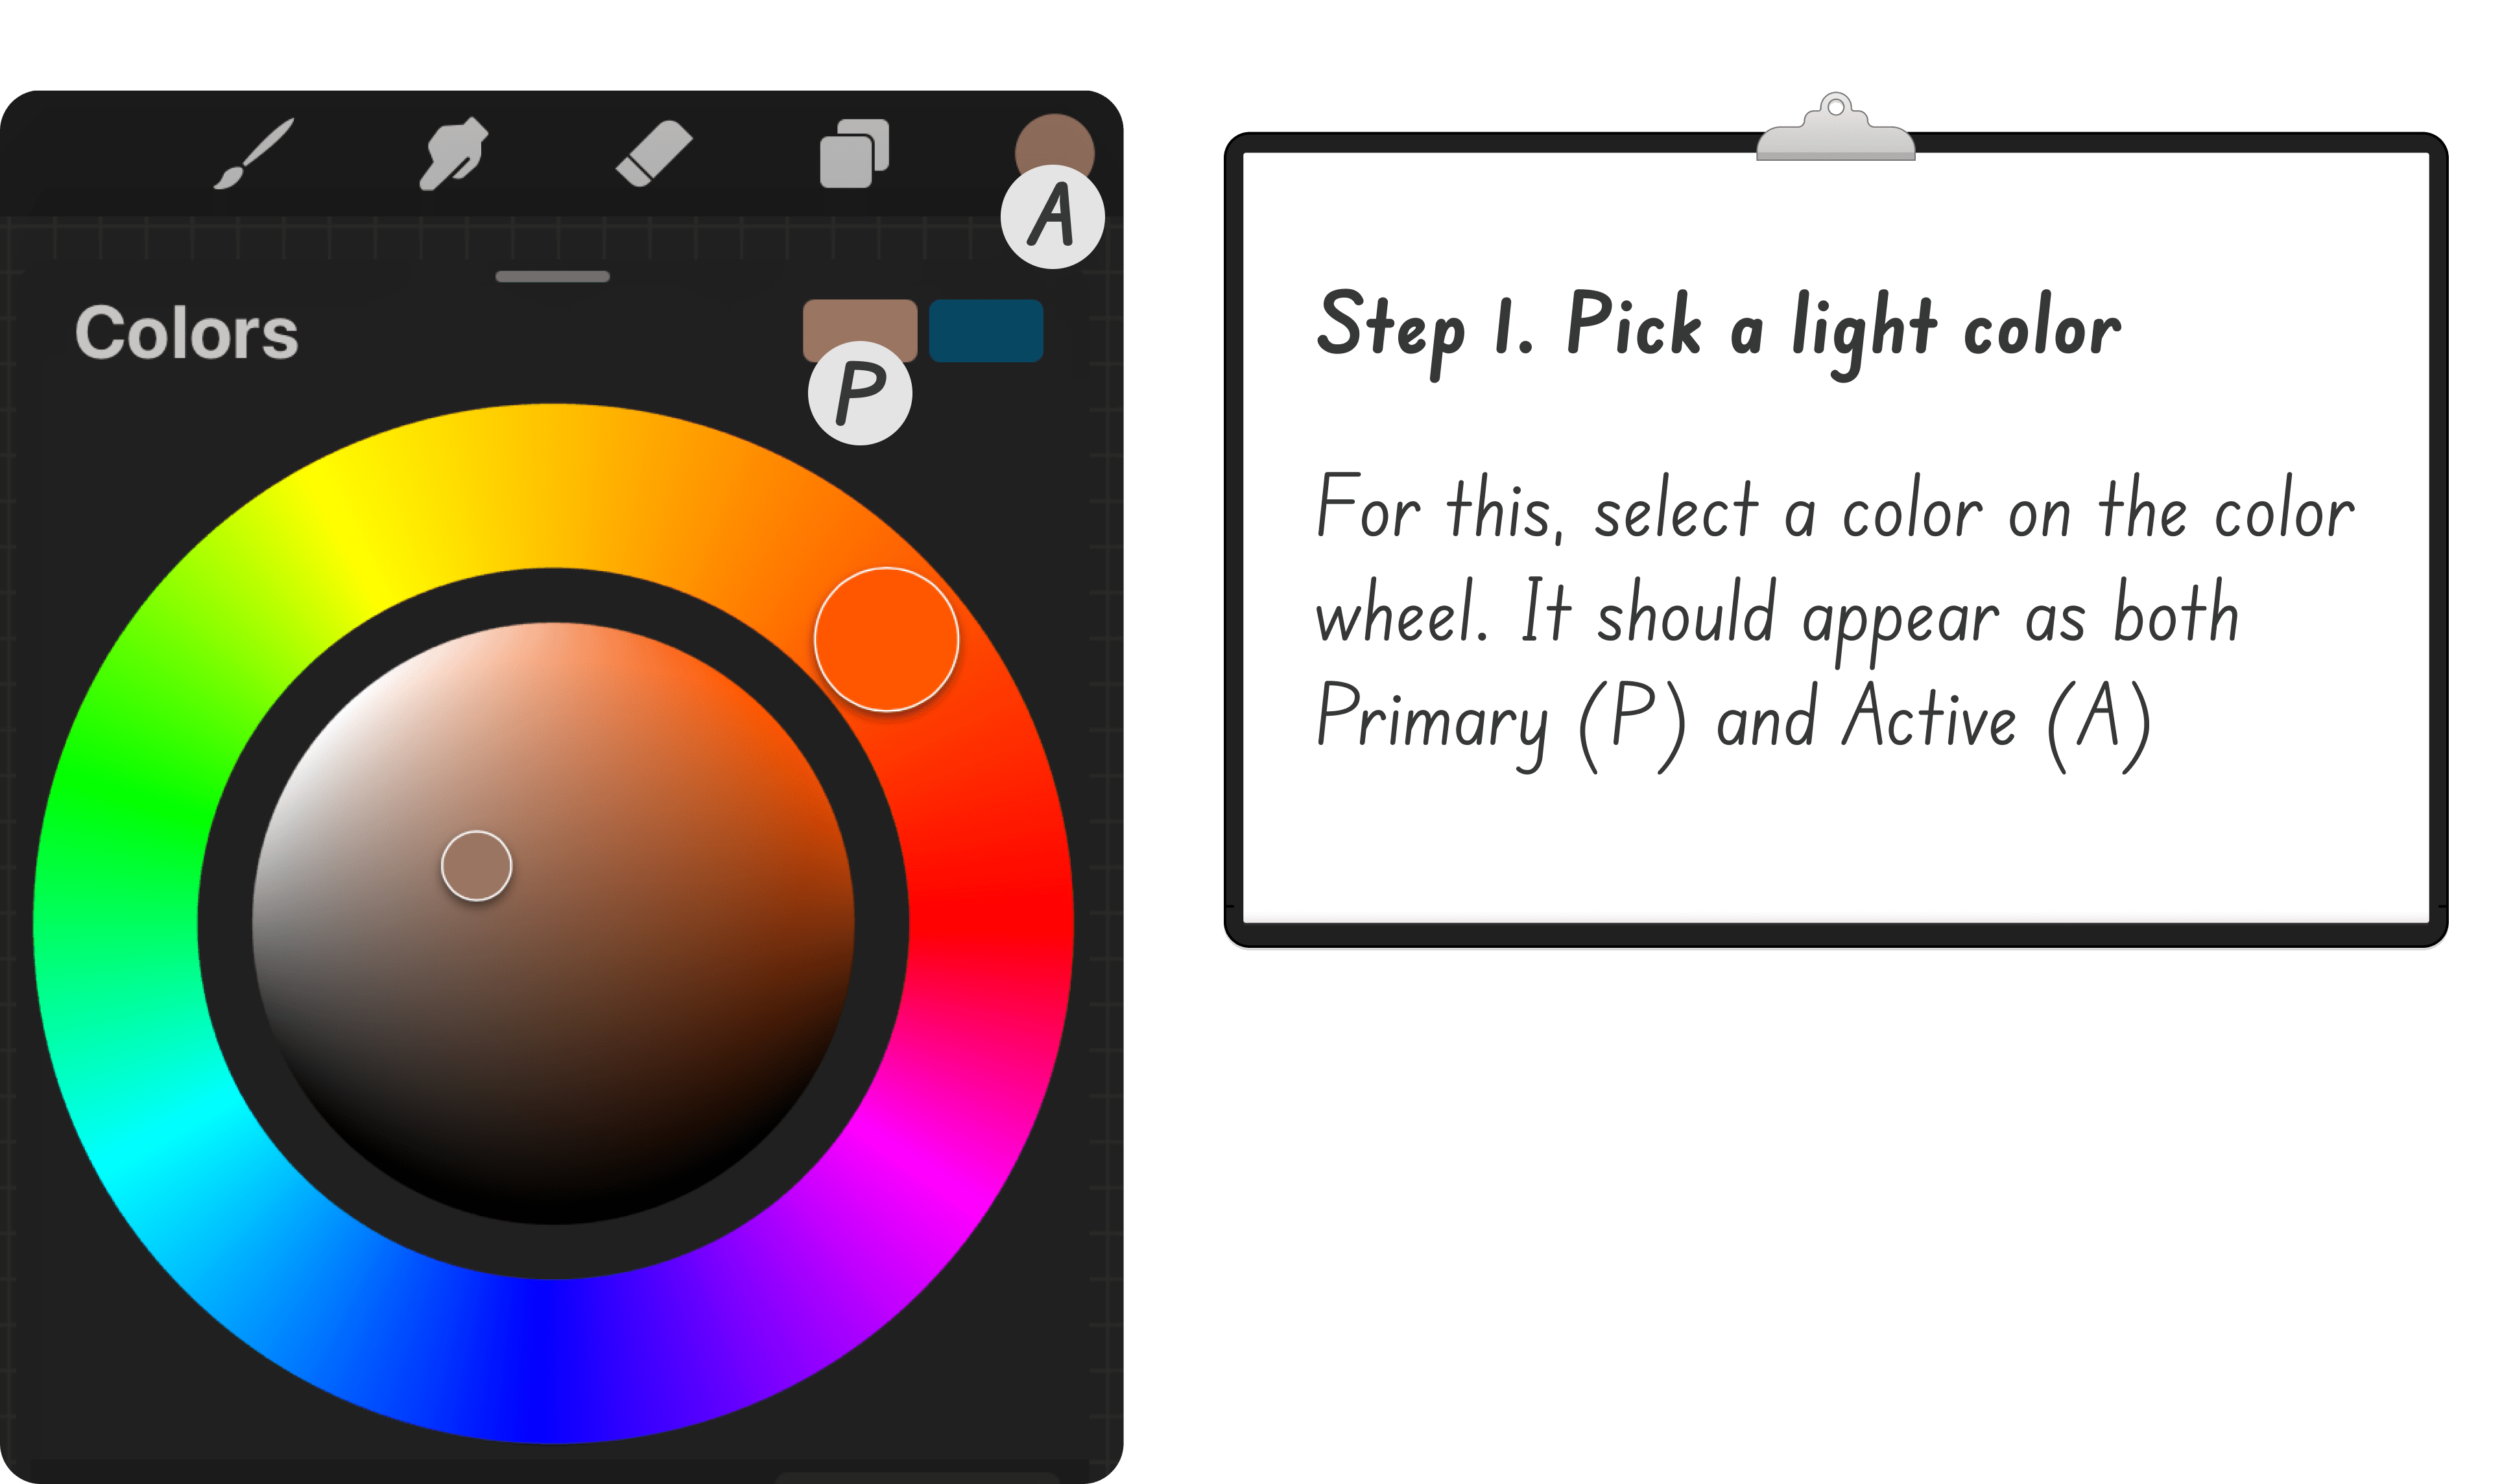
Primary, Secondary, and Active Color in Procreate.
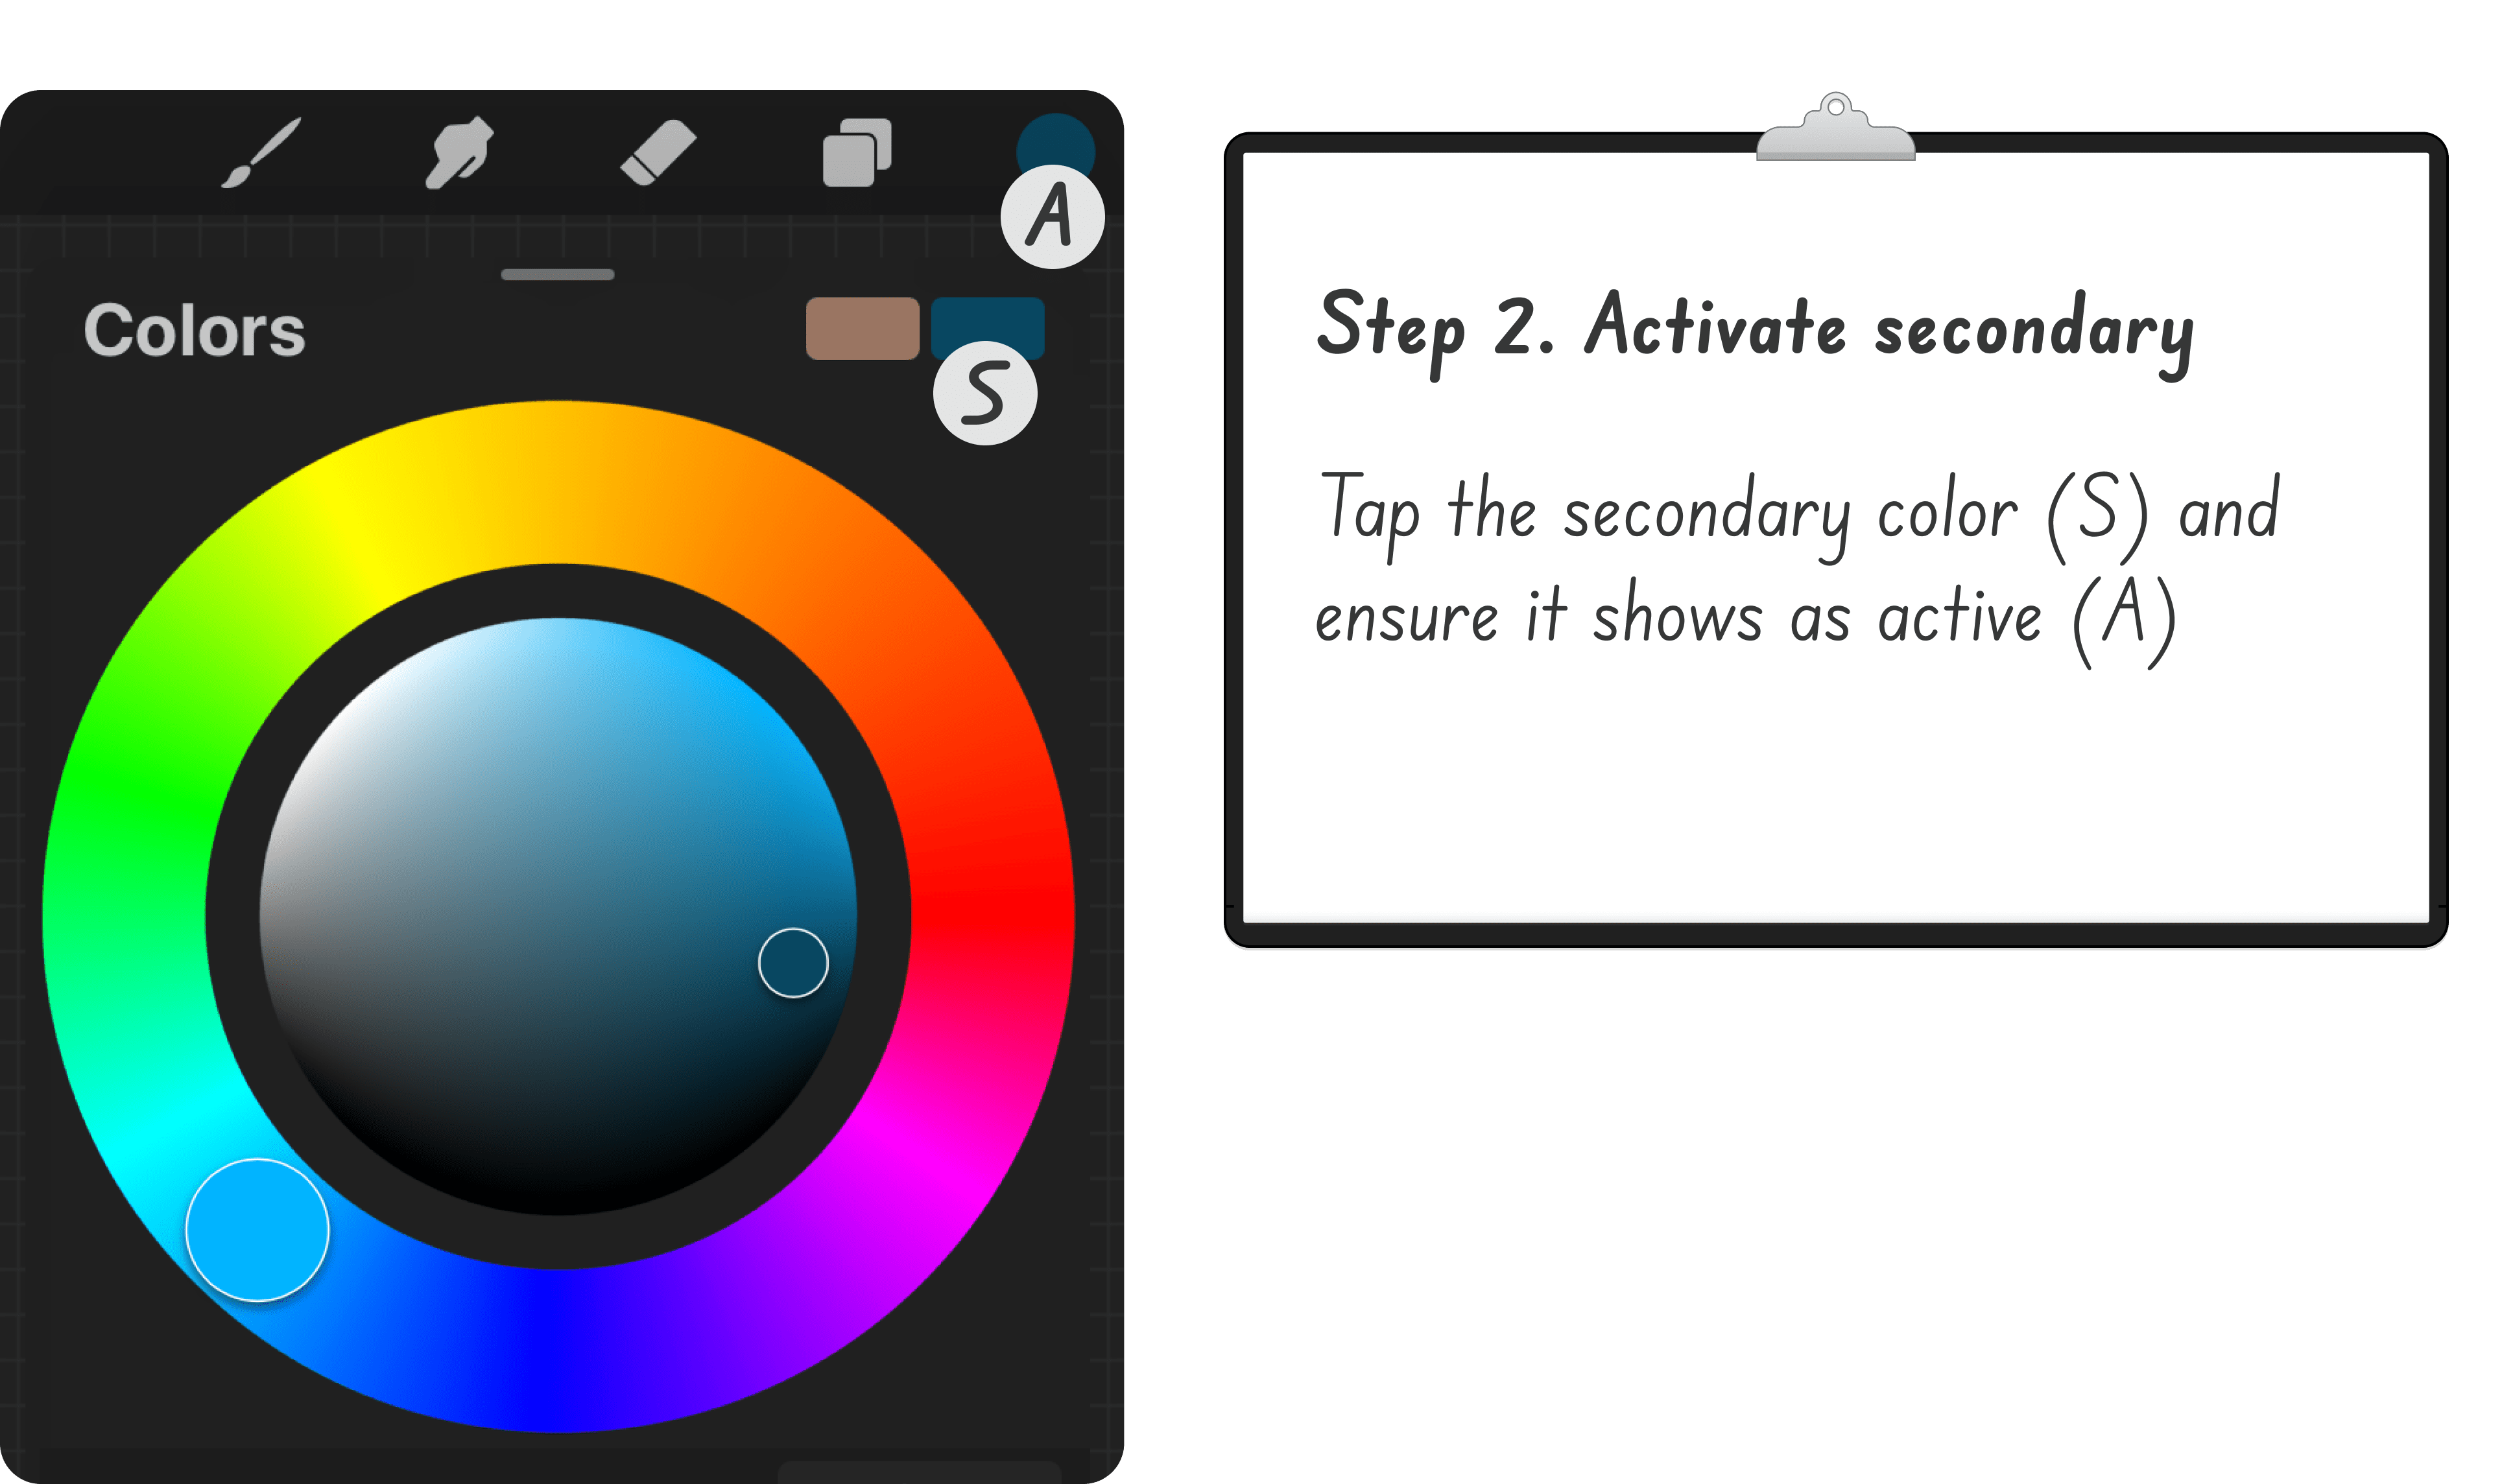
The side-by-side rectangles at the top right of the Color Panel display your primary (left) and secondary (right) colors. Tapping on either one will display it in the color circle at the top right of the screen, making it active.

Selecting Colors for Dual-Color Brushes.
Step 1. Pick a light color.
Select a light-to-mid-tone color using the color wheel. This color will become both the primary and active color.
Step 2. Activate the secondary color.
Tap the secondary color rectangle to make it the active color.
Step 3. Pick a dark color.
With the secondary color active, choose a shade that is noticeably darker than the light color from Step 1. Now, you have a color pair to work with.

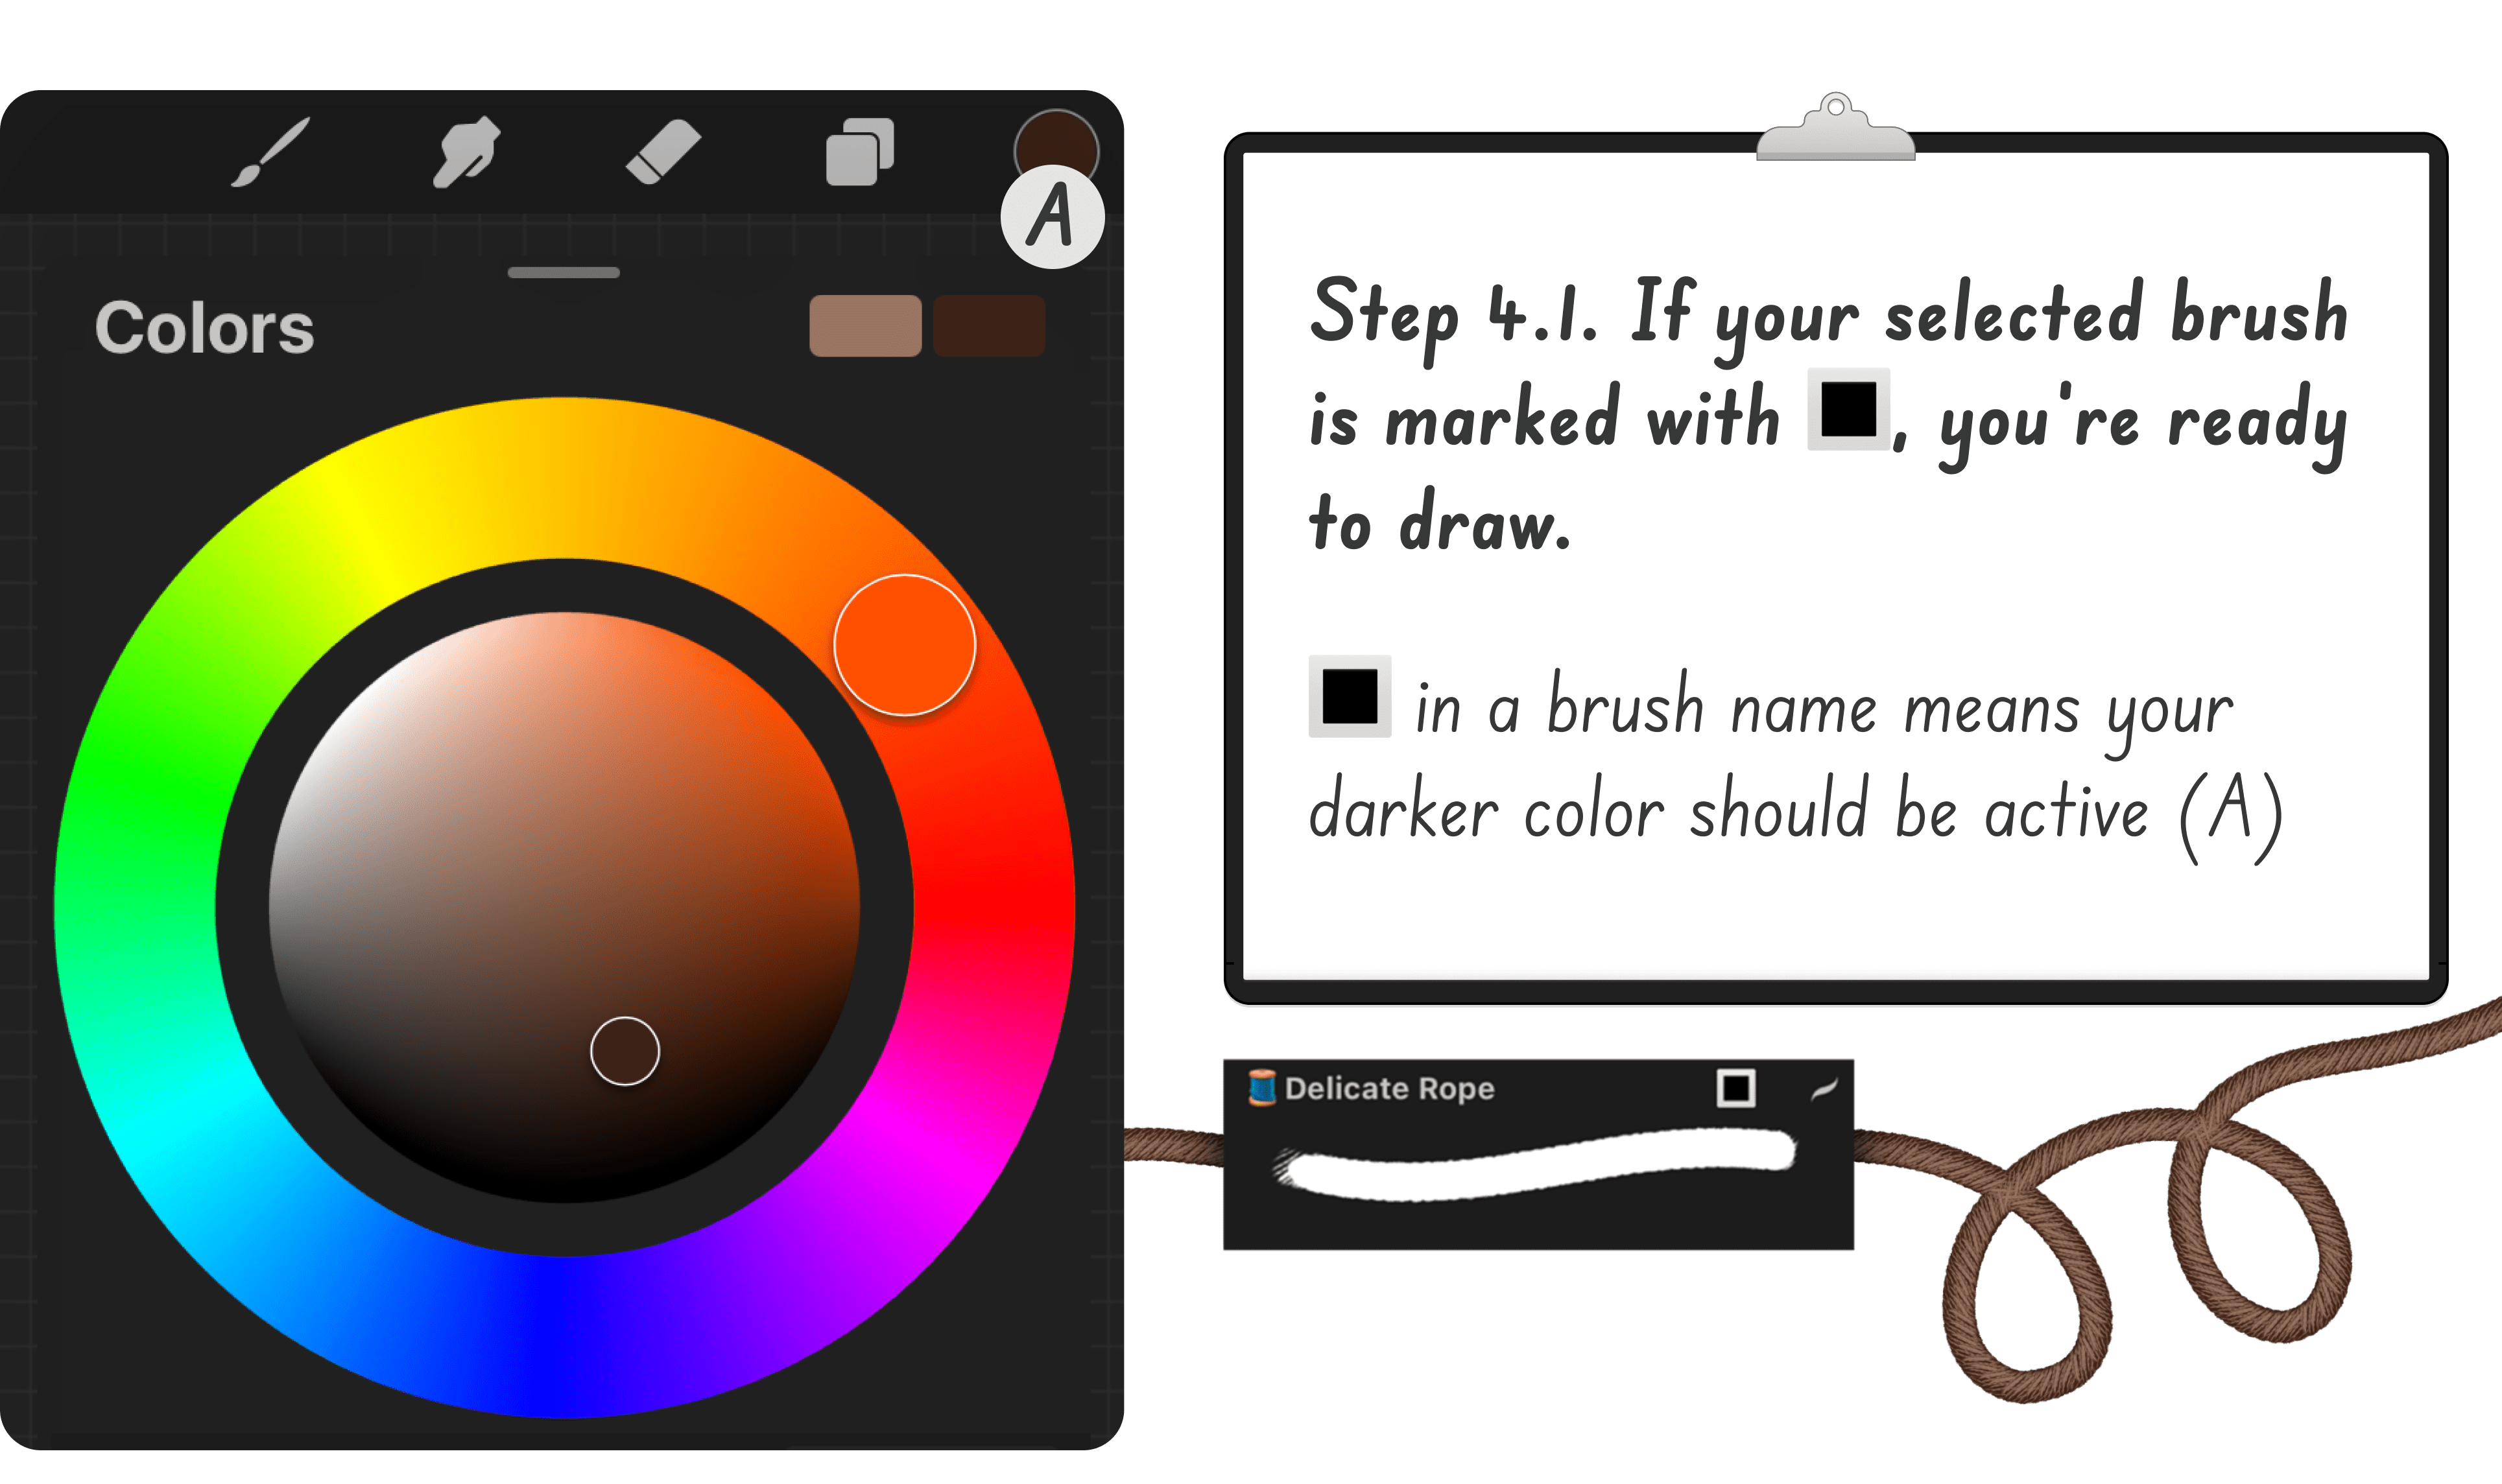
Step 4. Set the active color based on the brush type.
For brushes marked with 🔳, make sure the darker color is active.
For brushes marked with 🔲, switch to the lighter color by tapping on it.

👉 Try it Yourself!
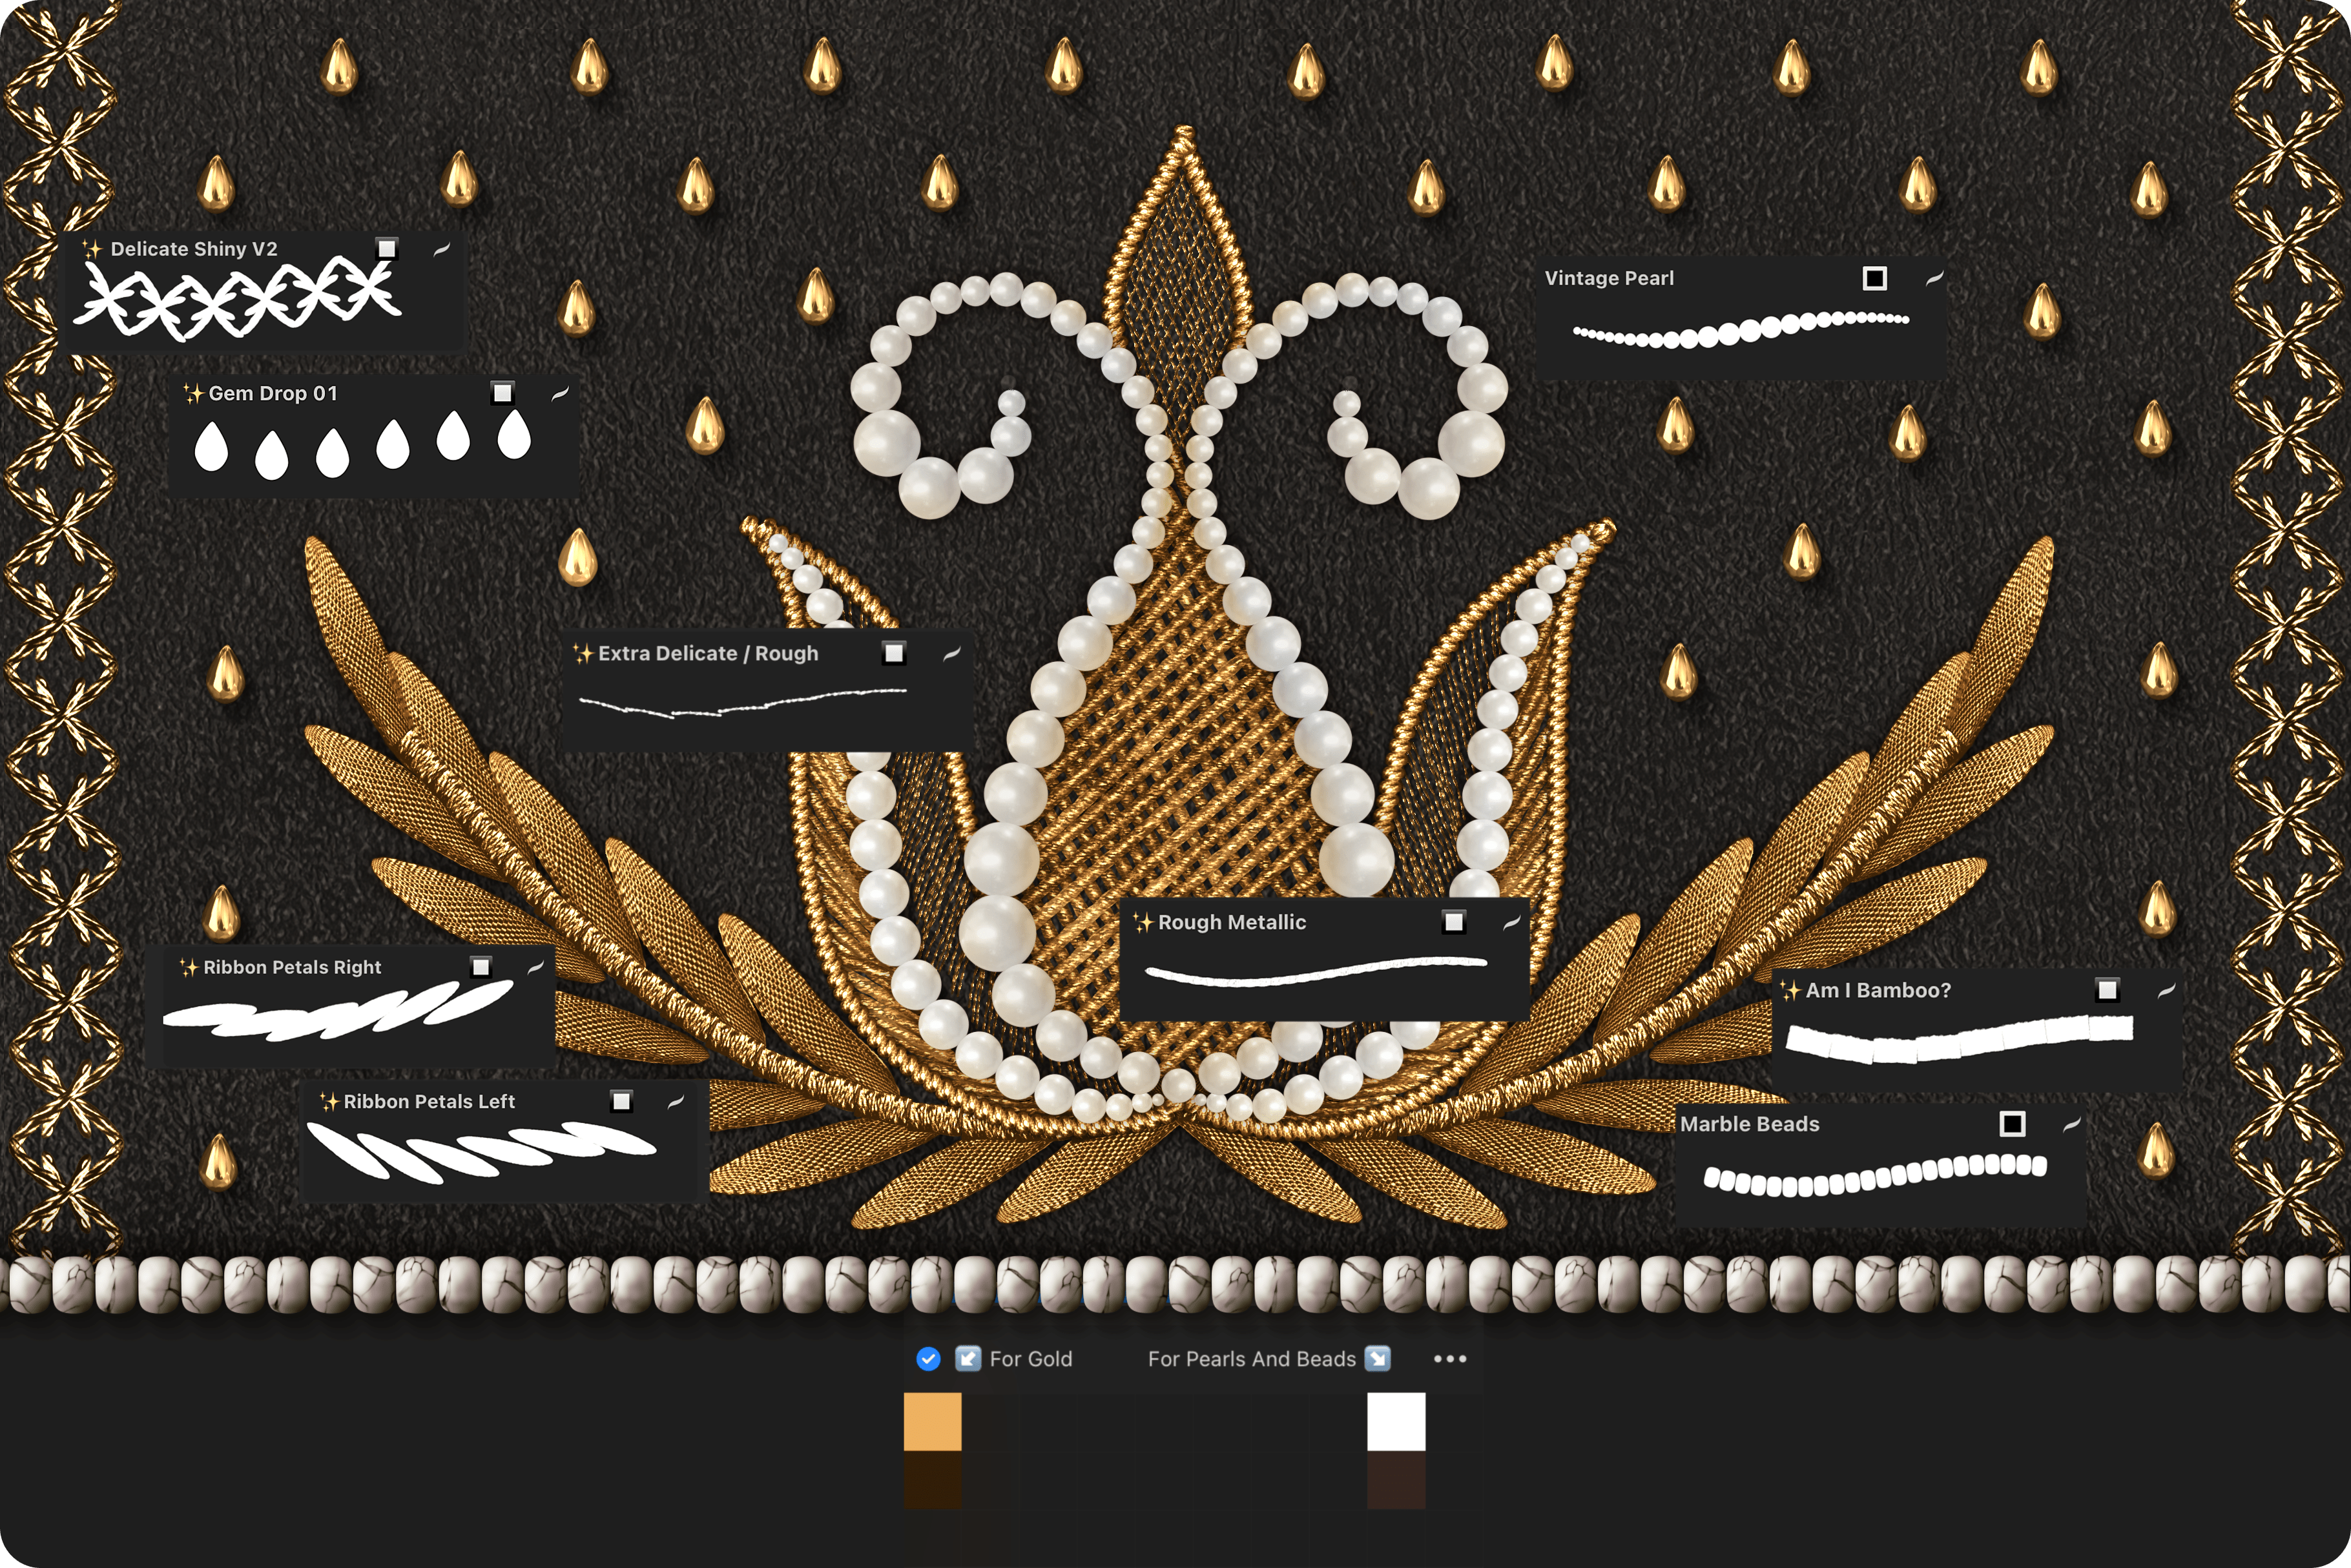
You can use this sample from the Goldwork Art Box to practice.
I've included brushes marked with 🔲 and 🔳, allowing you to test steps 4.1 and 4.2.
Plus, there's a simple color palette I used to create the illustration below.